Table of Contents
Introduction
This page tells you how you can recycle Christmas cards, greetings cards, gift tags, and wrapping paper, to raise funds to help animals.
You will see the kind of creations you can make, and where you can donate them to raise funds for animal charities and rescues.
The examples shown range from simple, to a little more ambitious. You can recreate the designs on this page, or use them as inspiration for your own designs. Many of the ideas shown can be combined. For example, the ideas for greetings cards can also be used for gift tags. Use ideas from each section, mix them up, and have fun experimenting with designs.
If you can adapt the designs to incorporate animals, your work should more easily raise money to help animals.
Image: Ways to reuse and up-cycle / recycle Christmas cards to help animals in need
Remember you can use both the inside and outside of the greetings cards. Printed text and pictures inside cards can be used as well as the designs on the outside.
Other decals and embelishments you get with gifts and cards (such as bows, buttons, etc) can also be re-used.
Below: You can recycle your Christmas cards, other greetings cards, gift tags and wrapping paper. Make them into a new creation, or take them to an animal charity collecting old cards to recycle.
Here are other ways of crafting to help animals.
What You Will Need
To re-create the examples of recycled Christmas cards, gift tags and wrapping paper on this page, you will need:
- Old Christmas cards / greetings cards,
- Wrapping paper
- Gift tags
- Any other craft bits and pieces you have salvaged
Also:
- Blank card
- Scissors
- Scalpel & cutting mat or guillotine
- A ruler
- Ribbon
- Glue or double sided sticky tape (or raised sticky pads
if you want to create a raised 3D effect).
How To Make Templates
Templates are a shape you use to draw around. You will need to make templates out of card for some of the designs on this page. They are very easy to make, and you can’t use them time and again.
Depending on what shape you want, you could use household objects and draw around the bottom of them. For instance, if you are making gift tags and you want them to be round, you could draw around the bottom of an aerosol can.
When using pictures from magazines or the internet, make sure they are still recognisable when they are in silhouette form.
How To Make A Template:
- Find a shape you want for your template.
- Glue it onto a piece of card or draw around it onto card.
- cut around the shape
You now have your template to draw around, and to use as many times as you like.
If you find shapes for your template that are already on card, you can skip step 1 and 2 and go straight to 3.
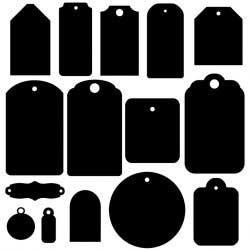
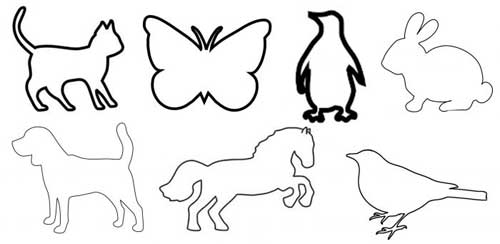
Image: You can use shapes like these for your templates, or you can find simpler shapes, that are easier to cut out.

Using a charity search engine when searching for free template shapes online means you can raise money for animals while searching.
How To Fold Your Card Neatly
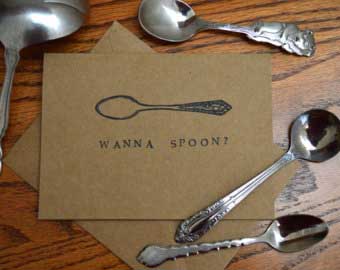
When you use old cards to make new cards, you will need to fold your new card neatly in half. A way to do this by hand is to find a flat, clean surface that is against a wall, and a clean spoon.
Put the end of your card against the wall, then curve the other end of the card over so that both ends are against the wall. Run the back of the spoon along where you want the fold to be, making sure both ends of the card are right against the wall all the time.
Alternatively, you can try scoring the card where you would like it to fold, and fold it along the score line.
You can also buy ready folded card, or ask your local printers if they can use their folding machine to fold card for you.
Image: To fold your new greetings cards by hand, you need a metal spoon, and a clean, flat surface against a wall
Recycle Christmas Cards Into Gift Tags
You can recycle Christmas cards, other greetings cards, and wrapping paper into gift tags very easily, with the help of:
- A template of the shape you want your gift tags to be (this could be an old gift tag or a gift tag shape printed from the Internet and made into a template)
- A hole punch or large needle
- Some glue, double sided sticky tape, or raised double sided tape
- Some brown string, cord or ribbon (which you may have been able to salvage from gift tags you have received).
Steps:
- Choose the shape, or shapes you wish to make your gift tag.
- Place your template on the area of the greetings card you wish to cut out, and draw around the template. Make sure there is no print or writing on the back of the card where you are cutting the piece out.
- Cut out the shape carefully, then punch a hole at the top of your shape. Thread your string or ribbon through the hole, and tie.
Image: You can find silhouette pictures of gift tag shapes online that you can use to make templates. You can also use old gift tags, or draw round household objects. Source
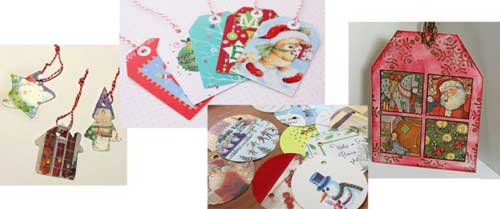
The gift tag on the right of the picture below is a little more complicated than the others in the image. The background is cut out of an old card, then four smaller pictures of identical sizes have been cut from wrapping paper or old cards, and have been stuck onto the background. A border has then been drawn around each of them.
Below: Recycle Christmas cards and other greetings cards by making them into gift tags to help animals
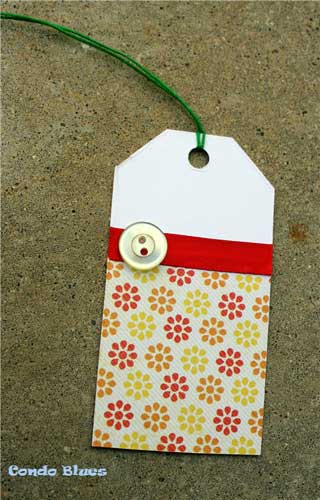
The picture below shows another example of a gift tag made by using old wrapping paper or greetings cards. The addition of a ribbon creates a neat edge, and a button is a nice embellishment.
Make Old Cards Into New Designs
You can recycle Christmas cards, other greetings cards and gift tags by designing and constructing new cards out of them. You can help animals by donating them to be sold to raise funds.
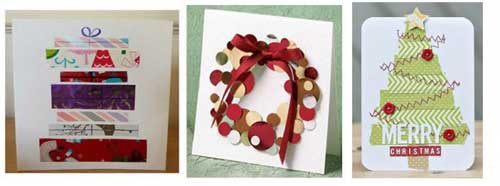
Pile of Presents Card
The card which looks like lots of presents in a pile, below left, is simply different sized strips, or rectangles, cut out of different cards. They are then fixed above one another with a little gap in between them.
Some of them have had a cross drawn on them to represent ribbon or string around the parcel, which you can do using a ruler and permanent fine liner pen. There is a bow drawn on top of the top parcel. Ribbon could alternatively be used for these things.
To make yours look as neat as this one, it would be best to use a template when drawing the shapes to cut out. Alternatively, measure them out with a ruler.
Circular Garland Card
The middle card, below, depicts a circular garland made of circles. The circles have been punched, or carefully cut, out of different cards, with the use of templates. They have then been stuck on, with all the colours complimenting each other.
A circle will have been drawn on the new card in pencil, as a guide for where to stick the small circles of card on.
The design has been finished off with a ribbon bow glued to the top.
Although different sized circles have been used here, you can use any shapes.
Christmas Tree Card
The card on the right in the image below uses similar principles as the pile of presents card on the left. However, instead of a gap being left, the rectangular strips of card have been slightly overlapped.
The sections of card have been cut from two colour co-ordinating cards, or from different sections of the same card. They are equal height, but the widths get narrower to create an overall tree shape.
A star cut out from an old card has been placed at the top, over-shooting the edge of the card.
Buttons have been used for baubles and stitching appears to have been used as tinsel on the tree. If you are not good at sewing, either a pen drawing, narrow ribbon, or something else could be used. Alternatively, it could be left off completely.
A “Merry Christmas” cut out from old cards, finishes the design off.
Below: Recycle Christmas cards, other cards & gift tags into attractive new cards, such as these.
Star Card
For the example below, you need a star shaped template. Once you have made your template, draw around it on the back of the old greetings card you want to use. Carefully cut out the shape and stick it onto your new card.
Embellish it as you wish. Sometimes embellishments are good for hiding small imperfections.
Smaller stars have been stuck around the big one in this design. You don’t have to use a star in your design, you can use whatever shape you would like.

Use Strips Of Old Cards In Designs
You can easily recycle Christmas cards and other old cards to create the designs below. By cutting them into strips, you can make attractive new cards. You can then donate them to be sold to help animals (see table of contents).
You can use any colours, but try to make sure that the colours you use compliment each other so that your design looks attractive.
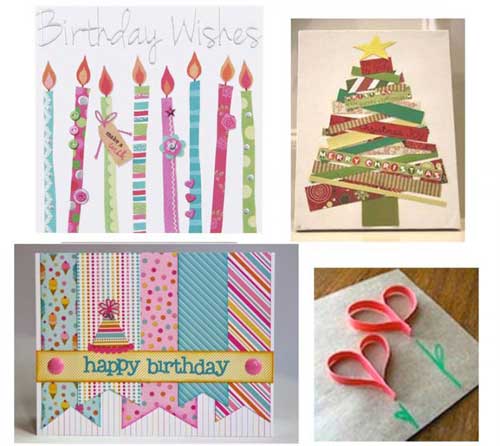
Candles Card
The top left design in the image below has long slim strips cut out to look like candles. They have purposely been hand cut with scissors, without the use of a template or measuring, so they do not look perfect.
They have been placed in a slightly wonky way that is not parallel to each other. Paper or card has been used to create the flames.
Embellishments such as buttons, small hearts, flowers and ribbons have been place on the candles.
The “Happy Birthday” looks like silver self-adhesive writing, but you can use the Happy Birthday greeting cut out of an old card.
Christmas Tree Card
The top right example in the picture below, is of another Christmas tree, but is slightly more complex.
Strips of different widths and heights have been cut and criss-crossed over each other. The strips get narrower the further up the tree they are, to create Christmas a tree cone shape.
The colours are shades found in nature and all compliment each other, giving the card a woody feel.
A square of an old greetings card has been used for the tree trunk, and a star cut from an old card tops the tree.
Ribbon Card
The bottom left design has five strips of card, cut at the ends to look like they are pieces of ribbon.
Three are placed equally spaced apart on top of the bottom layer, which is a faintly striped piece of card or paper. The remaining two strips of card are placed in the spaces, overlapping the other three.
A Happy Birthday greeting has been cut out of another old card and stuck on, and there are embelishments such as a party hat and two plastic jewels.
Heart Flowers Card
The bottom right example has been done by cutting four equal sized strips from a red card, then looping them over to create half a heart, and fixing them at the bottom. Two of them have then been stuck together to create a complete heart, and they have been fixed to the card.
A green pen has been drawn against a ruler to create a stalk, then a simple loop has been drawn for a leaf.
Below: Use strips of old greetings cards to create new ones to raise funds to help animals.
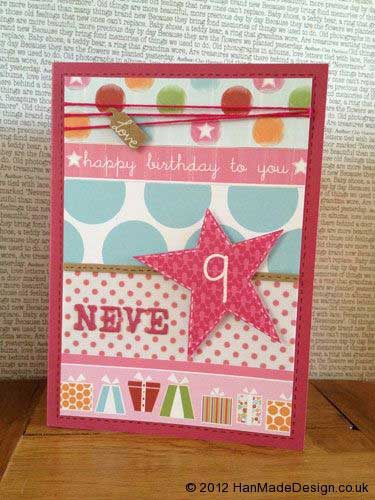
The design below shows how pieces of old greetings cards or wrapping paper can be used to cover most of the background. Embellishments such as ribbons and decorative string can be used to hide the seams.
Bunting and Gift Tag Cards
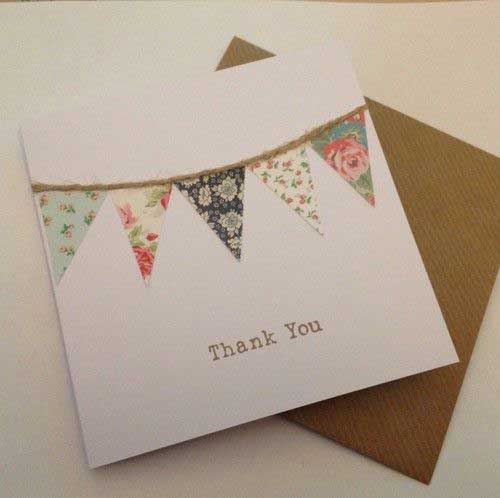
You can create simple, but very attractive, bunting designs on your new card. Use a template to draw triangles onto old greetings cards, all the same size. Cut them out and stick them onto a new card in the shape of bunting.
This design has natural brown string for the bunting to “hang” from. You can stick a greetings message that you have cut out of another card.
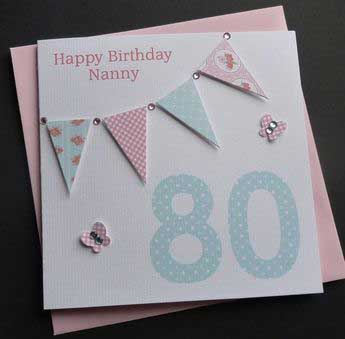
In the design below, adhesive sparkly plastic jewels have been stuck on between the bunting to represent the string.
You can stick on any other embelishments you have kept fom other cards. You may want to use other bits and pieces you have collected too, such as buttons.
The butterflies in the design below have been made using folded card, or paper, and jewels. You may want to make embellishments such as these if you have no others that you want to use.
Simply fold a piece of card or paper, and hand draw the shape of a butterfly wing. When you unfold it, you will have an identical wing on the other side. Use anything you like for the body.
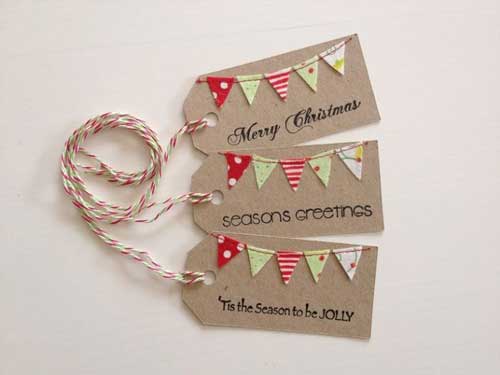
You can use this bunting idea to recycle greetings cards into new gift tags, similar to the example below.
Create Multi-Layered Cards
Recycle Christmas cards, greetings cards, wrapping paper and gift tags, by making them into multi layered designs, like the ones below.
These designs are all about colour co-ordination, an attractive layout, and the building up of layers.
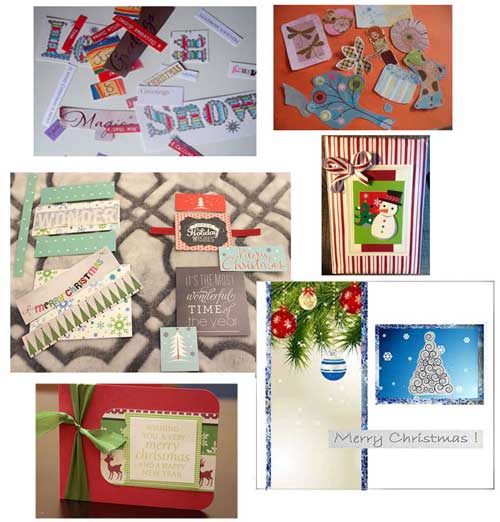
Red, Green and White Christmas card
With the bottom left design, the colour of the red background card has been matched to the colour of the reindeer in the layer on top of it.
The light green colour in the foliage pattern, has been matched to the border of the layer on top of that.
The very top layer has writing on it that matches the light green of the layer underneath it. Because it is a bigger piece of square card than the top layer, it looks like a border.
Notice also, that the darker green colour on the foliage pattern has been matched to the ribbon at the side.
Snowman Christmas Card
The snowman design below has used a red and white striped background with a white layer on top of that. That layer matches the white in the striped background and has a thin green line around the edge.
For the next layer, a red strip from a card has been used that matches the red in the striped background.
A rectangle of card, the same shade of green as the thin line border on the white layer, has been placed on top of the red layer. Only the top and bottom of the red layer can be seen.
This green layer has been decorated with three smaller pictures cut out of old cards. These create a scene of a snowman, a Christmas tree and a red snowing sky behind them.
Finally, a ribbon bow, that matches the red and white striped background, has been fixed to the corner of the white layer.
Have Fun Experimenting
The middle left picture below shows pieces of card that have been cut out and sorted into groups of four different designs. These are ready to put onto new cards.
You can have fun playing around with different designs of your own, deciding on what looks best.
Blue, Silver and White Christmas Card
The bottom right card is white with a long blue rectangle of card put down the left side. The same card has been cut into a square and put on the right side of the card.
A narrower rectangle of silver card with a baubles design has been placed on top of the blue one at the left side. The blue layer can be seen poking out at both sides. The silver on the top layer matches the areas of silver that can be picked out in the darker blue layer beneath.
A smaller square of complimentary blue has been placed on top of the darker blue layer beneath it on the right. There is a darker blue square that is poking out from underneath on all four sides, so it looks like a border.
The blue layer on top matches blue of the Christmas bauble at the side of the card. The snowflakes match the white of the background card.
On top of the lighter blue layer on the right, is placed a silver Christmas tree. The silver on that matches the silver on the darker blue first layer.
Finally, a silver strip saying “Merry Christmas!” is placed partially over the layers on the left, but also filling the blank space on the right.
Below: Pictures and words cut out of old cards are shown in the top two pictures. The middle left picture shows cut out pieces sorted into four designs ready to fix to new card. The remaining pictures show old Christmas and greetings cards recycled into new multi-layered card designs.
Collage Cards
You can recycle Christmas cards, other greetings cards, gift tags, and wrapping paper to produce collage cards. Below are just a few ideas, but you can use your imagination, and get inspiration from other designs on the web, to create your own, unique, designs.
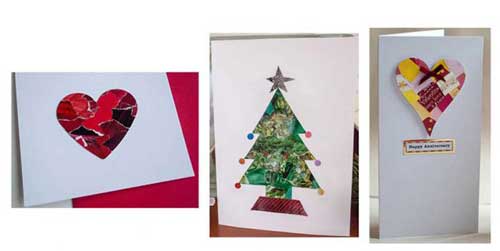
The heart designs in the picture below (left and right), and the tree design (middle), have been made by ripping or cutting up wrapping paper into small sections.
Different shades of red have been used for the heart on the left, and different shades of green for the tree in the middle. Shades of white, pink, red, and yellow have been used for the raised heart on the right.
They have been fixed onto a section of old greetings card – or paper for the design on the right – big enough to cut the heart or tree shapes out of.
Choose A Shape For Your Collage
To get the shape you want, use a template (see the template section of this page). You may want to do your collage on paper because you want it to appear quite flat, like the design left in the image. Once it is done, place your template on top of your collage and draw around it. Carefully cut out your shape and fix it to the card. This helps it have neat edges.
For the raised heart (right on the image), the collage has been done on card rather than paper. Follow the same process as above, so your edges are neat. Then, use foam raised sticky pads to fix it onto your new card so it creates a 3D effect.
For the baubles on the Christmas tree, a round hole punch has been used to punch perfect circles in wrapping paper or card, and they have been stuck on.
Image: Recycle Christmas cards, other greetings cards, and wrapping paper into beautiful but simple collage cards.
Collage The Whole Card
There are collage cards below that are a little more complex.
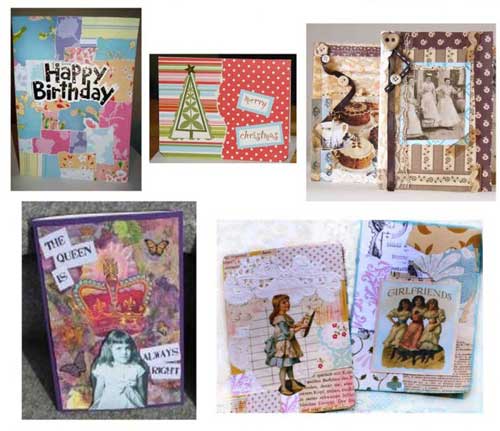
The whole of the front of the card is covered in layers of wrapping paper that has been ripped or cut, or in card.
The cards have been topped off with pictures cut out of old cards. Embellishments have been used such as ribbon and buttons. Pictures cut out of magazines and newspapers can also be used.
As with all designs, colour co-ordination is important, and only colours that compliment each other should be used together on a card.
You can choose whether to rip the pieces of wrapping paper in to small bits, cut them into strips or squares, or just cover the shape in one piece of wrapping paper. Have fun experimenting with your designs.
The examples shown top and bottom right have a vintage feel.
Image: Recycle Christmas cards, other greetings cards, gift tags and wrapping paper, into new collage cards like these.
Use Wrapping Paper Or Newspaper
You can use old wrapping paper, or old newspaper to create new designs. You can use wrapping paper for the background of the card, or to make flowers.
Paper Flower Card
To make the individual flowers, you need to have a long piece of newspaper or wrapping paper, and roll it into a small tube, about the size of a straw. Slightly flatten the tube, roll it up into a wheel, and fix it into place.
Fabric has been used for the leaves in this design, but you could use green coloured greetings cards to create them.

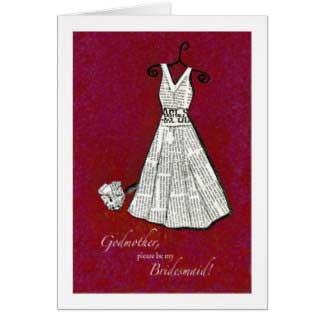
Paper Dress Design card
Below is another design where you could use old wrapping paper or newspaper.
If you want to use a background, make sure the background looks good along side the paper or card you choose for the dress.
Get a dress shape/silhouette you like from the internet to make a template, or draw your own. See table of contents for how to make a template
Roll up tubes of the wrapping paper and make them the length you want the skirt of the dress to be. Make them wider at the bottom and narrower at the top.
Slightly flatten the tubes so that together they look like pleats in a skirt. Overlap the tubes at the top, where waist of the dress will be. Experiment with how you overlap them and go with what looks most natural for how a skirt would lie.
Once you are happy, stick them down. Don’t worry if the top of your pleated skirt looks messy, as a band of paper will be used as the waist band of the dress to hide it.
Cut out your shape for the top of the dress, scrunch it into shape if you need to, and fix it on. You can cut additional strips to make a collar, as in the picture below.
Cover the waist band area with with a section of wrapping paper. Have the pattern running a different way to the skirt and top part. This will cover the messy bits of tube at the top of the skirt. You can scrunch it a bit if it makes it cover better.
Now For The Drawing Bit
Stick the finished dress onto your card and draw in a coat hanger. Do it lightly in pencil first so you can rub it out easily if it goes wrong. Look up pictures online to copy if that will help you. When you are happy with it, go over it in a black fine liner pen. The design below has also drawn a black border around the shape of the dress. This can be drawn in with a black fine liner pen.
You can add a flower or any other embelishments you want to recycle and re-use. You can also add printed greetings cut out of old greetings cards.
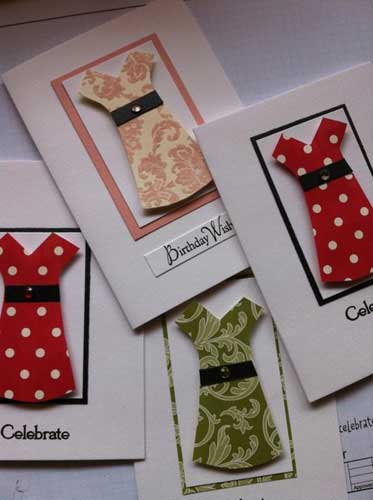
3D Dress Design
The cards below have used a similar dress theme, but are made differently. They have cut the dress shape out of old cards with the pattern already on. Alternatively, wrapping paper could be used to cover the card dress shape.
They have built the background up in layers, making sure the colours all compliment each other. Raised fixing tape has been used to make the dress shape raised and appear 3D.
Make Animal Greetings Cards
Card designs with animals on usually go down well with animal lovers. They should sell well to raise funds for animal charities and rescues.
Animal shaped silhouettes to make templates with are freely available online. See the “How To Make A Template” section of this page in the table of contents.
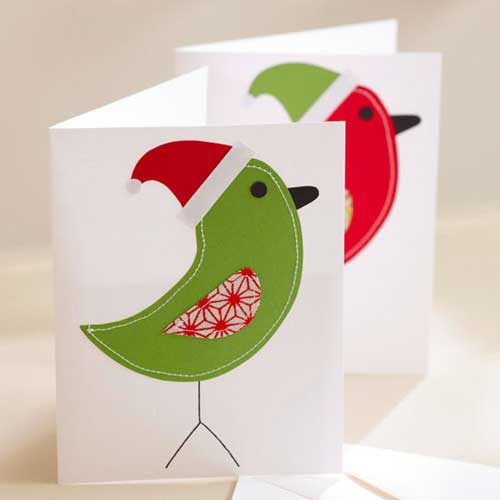
Robin card
You can create a design similar to the robin card in the picture below. If you are confident drawing your own shape for the robin, do that. Alternatively, make a template. Choose an old greetings card with a colour or pattern on it you like. Draw around the robin template onto the back of the card you choose, so your line won’t be seen on the front side you want to show. Cut it out and lay it on to a new card ready to be fixed.
Cut the shape of a wing out of another card that has a complimenting colour or pattern.
Do the same with the shape for the Christmas hat. Cut out a strip from a white area of an old card (this might be the inside of the card), to make the hat rim. Do the same with a round shape for the bobble at the top of the hat.
The final pieces you need to cut out are for an eye and a beak. Once you are happy with your layout, fix it all into the card. Finally, draw some simple stick legs with a fine liner pen.
The example below has stitching around the edge of the robin. If you are not confident doing that, you can draw a broken line in instead, or leave it out completely.
Deer Card
A card similar to the deer design below can be easily achieved by using a template of a deer.
Draw around the template you have made onto the back of the card you have chosen. Cut out the shape and place it onto your new card. Then cut out pieces from another old greetings card to form the shape of the scarf.
Once you are happy with your layout, fix your design onto the card. You can embellish the scarf with a button and use bits of old cards, or other bits and bobs you have, for the nose and eye.

Use Old Gift Tags In Card Designs
If you save gift tags you receive, they can look really good incorporated into a greetings card design.
The examples below show various ways they can be included in the design of a greetings card.


Craft With Buttons
You can salvage buttons from old greetings cards, and old clothes, and you may be able to buy some from animal charity shops.
You can put them to good use to help animals, by crafting them into fundraising items.
Here are a few ideas, using just buttons and a black fine liner pen to make simple, but really funky, gift tags..
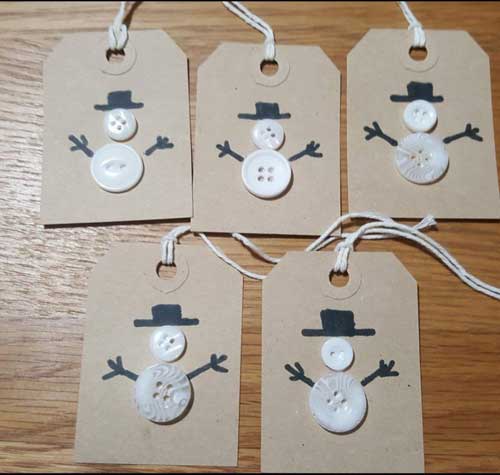
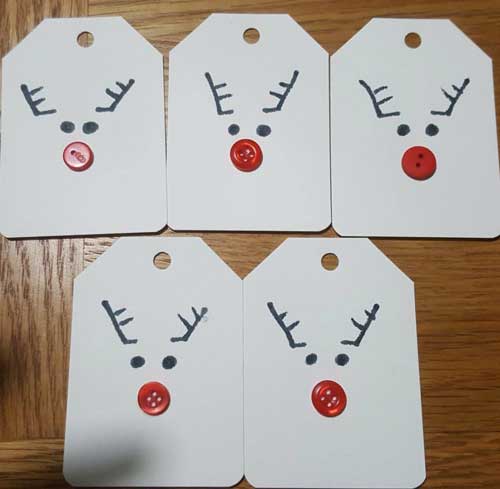
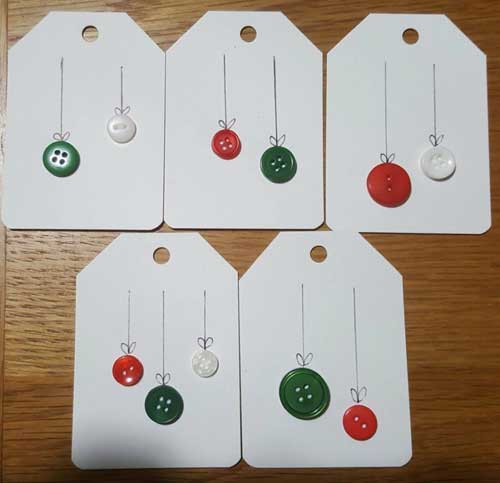
Here are Christmas card ideas using buttons.

Other Items You Can Make From Old Greetings Cards
You can recycle Christmas cards, greetings cards, wrapping paper and other things into a whole range of things, not just new cards and tags.
The picture below shows a number of decorations and other items, such as photograph frames, bookmarks and a range of Christmas decorations.
You can find many more ideas, AND help stop animal suffering at the same time, by searching for other designs you can create, using Charity Search Engines.
Image: Decorations and other items you can recycle Christmas cards, other greetings cards, gift tags and wrapping paper into.

Where Can I Donate My Items?
There are places you can donate your craft items so that they raise money to help animal charities and rescues. You can find them, here.
There are also groups of crafters who craft to help animals. Animal charities and rescues approach these groups to ask for their help. They are always looking for more volunteer crafters to help animals with their skills. You can find them here.
Image: Your crafts can raise money to help animals by being sold or auctioned through social media groups.

Many Other Ways To Help Animals
Here are more ways you can craft to help animals.
On this site there are many varied ways you can help animals and help stop cruelty. In fact, there are so many different ways that there is something for every personality type, no matter what their circumstances. See what would suit you.
If you would like to learn more about why we so urgently need to help stop animal suffering, please see this website. It will allow you to broaden your knowledge of many different types of world wide animal abuse. It will also give you the ability to help animals by spreading awareness and answering questions people may have. Please be aware that you may find the information distressing.
One great way to help animals is to share the information you have seen on this website. Doing so means more people could help stop animal cruelty, and that would make you responsible for more animals being saved from suffering. Together we can help people help animals <3
Comments
Do you know of any information you think should be included on this page? Would you like to share any crafts you have done to help animals? We’d love to hear from you.
